To Contact Me
Skydiving is an inherently dangerous sport, but with well‑maintained equipment and the correct training this can be minimised. Skydiving with a camera system attached to your head and wearing a camera suit with wings can bring a whole new plethora of problems. The following is a brief technical description of my skydiving camera equipment and the additional safety issues I had to contend with.
Camera Helmet
The following should be considered when choosing and jumping a camera helmet:
• The helmet should be a secure fit to prevent potential neck/head injuries when mounted with heavy cameras and more
importantly preventing the helmet slipping‑off during canopy deployment.
• Shape and design of the helmet and positioning of the camera equipment to avoid snagging of risers, deployment bridle
or canopy suspension lines.
• Does the helmet have a cutaway system in the event of any entanglement with the deployment bridle or canopy suspension lines.
• Is the camera equipment positioned in such a way that normal after opening procedures will not be affected.
• Will the helmet and camera equipment block your vision in any way.
I have used two styles of camera helmet made by Bonehead Composites of Perris, California, U.S.A., a leading skydive camera helmet
design and manufacturer.
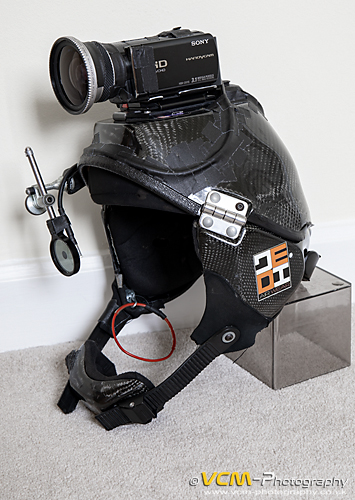
My first helmet, the ‘Da Bomb’ was an open‑face style helmet with a chin‑cup and rear‑fasten assembly.
I used this carbon fiber lightweight helmet primarily for tandem video with a Sony CDR‑PC7E or Sony DCR‑PC100E camcorder
mounted on an ‘L’ bracket attached to the left‑hand side of the helmet and/or occasionally with a Canon 35mm
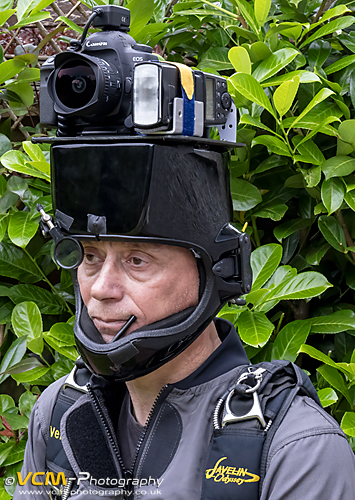
or later a digital camera mounted on the top plate. See photo below.
With the introduction of HD video I used a Sony HDR-CX115 camcorder mounted on the top plate of the ‘Da Bomb’. I used this primarily for FS 4‑Way training and competition jumping. See photo below.
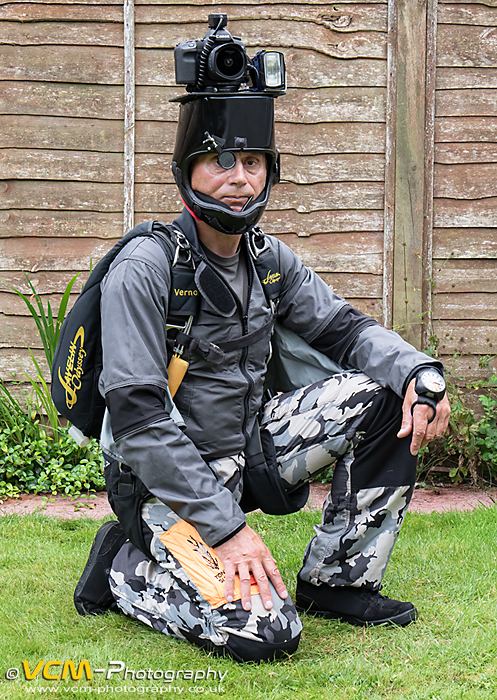
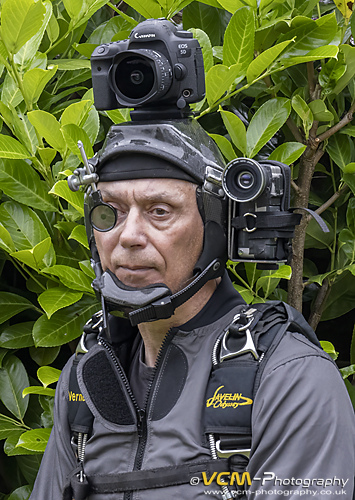
The Bonehead Flat‑Top Pro was the helmet I used for my serious photography set‑up. This carbon fiber helmet with an exceptional
strength‑to‑weight ratio was the helmet of choice flown by some of the top names in skydiving aerial photography, such as
Norman Kent, Joe Jennings and Michael McGowan.
The full‑face helmet with a rear‑entry system has a thermal‑fit liner for secure fitting and comes standard with a
quick emergency release‑cutaway system and riser slap release button protector.
My photography set‑up on the helmet consisted of the following:
• To minimise any snagging issues, I fitted a larger carbon fiber top plate to the helmet so I had more space to mount my
equipment. This plate could be drilled with holes to mount brackets and route wiring inside the helmet.
• Secured to the top plate was a Really Right Stuff quick release camera mount, onto which I attached my Cannon digital
camera of the day (EOS 20D, EOS 50D, EOS 5D Mk. II).
• My lens of choice was a Canon EF 15mm f2.8 Fisheye, which was fast and light. I also used a Sigma 8mm f3.5 EX DG Fisheye
and a Sigma 12‑24mm f4.5‑5.6 EX DG HSM lens. Focussing was pre‑set manually by the hyperfocal distance method.
• Sighting of the camera was via a Newton ring‑sight, which was calibrated/aligned to my eye, so what I see through the
ring‑sight is what the camera is looking at.
• To keep the operation of the camera shutter release hands‑free, I triggered it with a mouth operated blow switch. The blow
switch (a micro‑switch/diaphragm combination) is about the size of your thumb and positioned inside the helmet shell.
To trigger the camera, you simply blow lightly into a small diameter hose. Short puffs into the hose fire off a single frame, while a
constant blowing pressure will yield continuous shooting.
• A Canon Speedlite 580 EX E‑ETTL II Flash was attached to the helmet via a home‑made bracket and linked to the camera
via a Canon Off Camera Shoe Cord 2 TTL. To reduce the weight on my head, a battery pack for the flash was secured inside my camera suit
and attached to the flash cable inside the helmet via a home‑made safety quick release cable.
Photos below of my Bonehead Flat‑Top Pro photography set‑up

When jumping with a camera helmet, situational awareness is important in freefall and under canopy. In freefall many accidents have occurred
from skydivers going below the stipulated minimum deployment altitude due to focusing too much on their subject and losing track of
their altitude. As recommended I always used an audible altitude device as a back‑up to my visual wrist altimeter. I used a
Larsen and Brusgaard, ProTrack II audible altitude device which fit comfortably next to my right ear in the helmet liner. The ProTrack
could sound more than one warning signal which could be set for various altitudes of my choice.
Before a camera jump I always thoroughly rehearsed my emergency drills (as done for any skydive) but also mentally rehearsed
the situations that could occur carrying the additional equipment. As a safety precaution I always initiated the deployment of my canopy
at a higher altitude than I normally would, so I had more time to sort any problems if they occurred.
On initiating the deployment of the canopy, it was a normal practise to look up and check the inflating canopy, but when jumping with
a camera helmet it's important to keep looking at the horizon to ensure the head remains in line with the spine. Any position
of the head that is not in line with the spine during deployment could result in neck injury in the event of a hard opening.
Camera Suit
A camera suit has wings which gives you a greater range of speed in freefall. Tuck the arms and wings in, enables you to fall
faster (less drag), while spreading the arms out and inflating the wings catches more air allowing you to fall slower.
This range of speed in freefall makes a camera suit a good tool for videoing tandems and formation skydiving, but the wings can create
difficulties when it comes to the deployment of the parachute.
Problems to be aware of:
• When using the throw‑away deployment system (right arm) you must use an arm movement in a wide arc to ensure
you do not put your arm through the gap between the camera suit and the wing attachment point. Otherwise you would get a pilot chute
in tow malfunction.
• The pull motion should be exaggerated so that the pull hand completely clears the camera wing, throwing the pilot chute clear
of the burble into clean air, otherwise you could get a pilot chute hesitation.
• Collapsing the wing of the free arm (left arm) during deployment can prevent the wing inflating and prevent you
from an uncontrolled rotation.
Camera Suits used:
• Firefly Camera suit ‑ A full body suit with large wings.
• Jedi Air Wear ‑ Camera jacket.